Getting good photos first is always best, but, if your images are a little less than perfect, there are several things you can do to improve them. Photo editing is a wonderful way to improve your images, even if they are not quite perfect.
Of course Photoshop is the best program to use, but it can be very expensive. Here is a link listing several free image editing programs and the pros and cons.
Of course Photoshop is the best program to use, but it can be very expensive. Here is a link listing several free image editing programs and the pros and cons.
I always get my free software from downloads.com I find their rating system to be helpful and they are pretty safe. Although nothing is free, just make sure you have a good spyware and adware removal program running on your PC. Picnik Is also a great online editor for the novice.
Now that you have a photo editing program, play with it. Your less than perfect photo CAN be improved on. I always take my photos with a fairly high resolution. This will make a crisper picture. You can always reduce your resolution later.
Now that you have a photo editing program, play with it. Your less than perfect photo CAN be improved on. I always take my photos with a fairly high resolution. This will make a crisper picture. You can always reduce your resolution later.
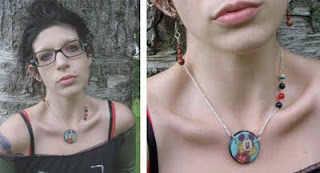
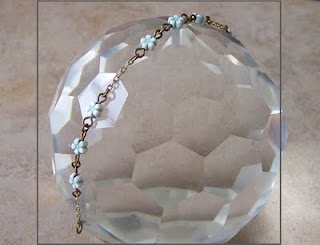
Here is an example of an edited image:
 The first picture is too light, not enough contrast and definition, and the composition could be more interesting.
First: adjust levels. Play with these settings until you get a look you like. This can add definition and contrast.
Second adjust brightness and contrast. In this case I would make darker and raise contrast.
Your photo editing program may not have a levels setting but they all have brightness and contrast.
Third step is color balance. Have your item in front of you and adjust the color on your screen to match what is in your hand. This will not be perfect, as all monitors do not have the same color settings. You can get complaints about your color, but it is impossible to have your color match every screen in the world. The best you can do is match yours and add a disclaimer on your site.
Once your photo is perfect, crop your image. Try a few different compositions, until you get the one that looks the most interesting and shows off your art. Remember, your first image is a teaser to make a buyer want to see more. Your remaining pictures should show your complete item with as much clear detail as possible.
 I take my pictures in a rectangular format that Etsy uses for Treasuries. Try to imagine a square window. See example. This way you will have a nice composition in either the square or rectangular format.
Finally reduce your resolution to your sites specifications.
Now look at your pictures. Would you buy from this shop? Would you add these pictures to a treasury or collection? If yes, you have done a great job. Congrats!!!

1 comment:
More great advice! I use Picassa but am interested in checking out some of the others. It's fine but doesn't allow for adjusting color, which I would like for making reds and blues look more true.
Post a Comment